Code Modules are Java classes which implement the desired behavior of Event Actions, Document Lifecycle Actions and Document Classification Actions. Starting points for these classes can be generated using the code templates. With he Code Module editor of the ECM Developer plug-in you can create a new Code Module or update an existing Code Module.
Creating Code Modules
The following actions have to be performed to accomplish this task:
- Start the standard Eclipse New wizard by using the File > New > Other command:
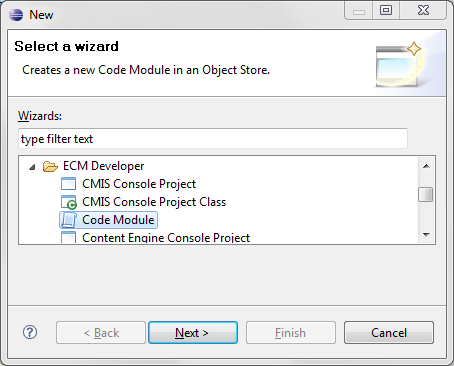
Select Code Module in the ECM Developer category. If the Object Store perspective is active then there is a short cut to the new code module wizard in the File > New menu. - In the next page of the wizard the necessary information can be supplied to start editing the new Code Module:
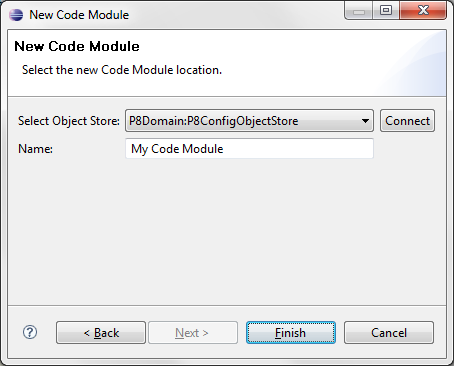
- If the wizard is finished the Code Module editor is opened using the name and Object Store supplied in the wizard:
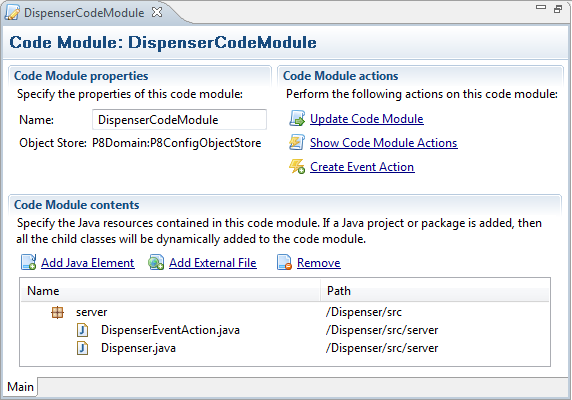
The name can still be changed, the Object Store not. Initially the editor will show an error message because the content of the Code Module is not yet set. Use the add commands of the editor to add files to the Code Module. There are two ways files can be added to the Code Module:
- Add Java Element: a dialog is shown with a tree view containing all the Java projects in the workspace. In this tree view either a project, package of java class can be selected. If a project or package is selected then all the child classes are added to code module. The editor will locate the compiled Java classes.
- Add External File: a dialog is show allowing the selection of an external file. This have to be either compiled Java class-files, tar-files or zip-files
These commands are also available in the context menu of the files tree view. With the Remove button unwanted elements can be removed from the Code Module. The files tree can be refreshed with the Refresh commands of the context menu.
Use the Save command of the editor to create a new Code Module in the Object Store.
Importing Code Modules
In order to edit existing Code Modules on the Content Engine they have to be imported into the Eclipse workspace. The following actions have to be performed to accomplish this task:
- Start the standard Eclipse import wizard using the File>Import command:
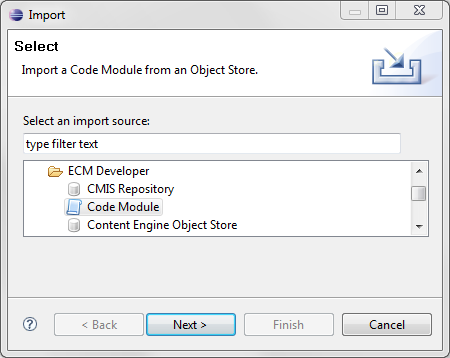
In the ECM Developer category select Code Module and continue the wizard. - The next page of the wizard is the Code Module selection page:
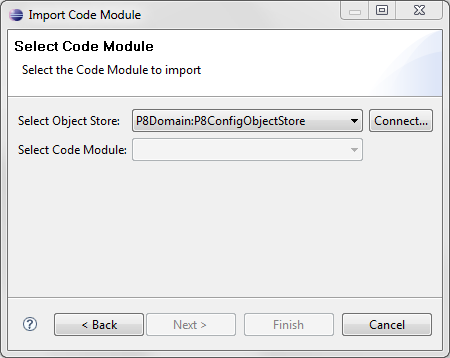
First select the Object Store and after that select the Code Module to import. Only Code Modules that are not yet imported are shown. If there are no Code Modules left to import a error message is shown. - If the wizard is finished the Code Module editor will open
Initially the editor will also show an error message because the content of the Code Module is not yet set. The Code Module editor will not retrieve the existing content of the Code Module on the Content Engine. Use one of the Add commands to add content to the Code Module.
Updating Code Modules
In the process of developing Code Modules the content of the Code Module on the Content Engine will change frequently. Therefore the Code Module editor provides functionality for updating the Code Module on the Content Engine. Actions are always coupled to a specific version of the Code Module. If you want your action to use the latest version of the Code Module the action must also be modified. The Code Module editor will also take care of this. Before you update your code module make sure that either your code is build automatically or that you manual build your code to the latest version.
The following actions have to be performed to accomplish the code module updating task:
- Select the Update Code Module command in the Code Module editor.
- If the Code Module is related to one or more actions then the action selection dialog is shown:
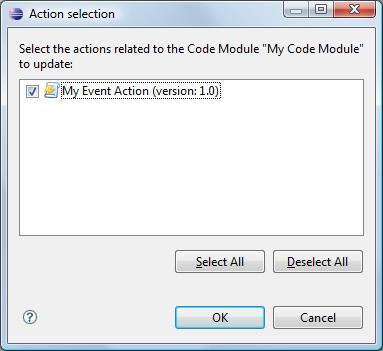
This dialog will show all the actions related to this code module and the specific version the of the Code Module this action is coupled with. Use the check boxes to select the actions which have to be updated to point to the latest version of the Code Module. If an action is not selected it will not be updated. - If this dialog is completed the Code Module and the selected actions are updated.
Additionally the Show Code Module Actions command of the editor can be uses to show which actions are coupled to the Code Module. This will show a dialog similar to the action selection dialog.
Creating Event Actions
The Code Module editor can also be used to create Event Actions based on the Code Module you are editing. The following actions have to be performed to accomplish this task:
- Make sure that your Code Module is already created on the Content Engine.
- Use the Create Event Action command to start the wizard:
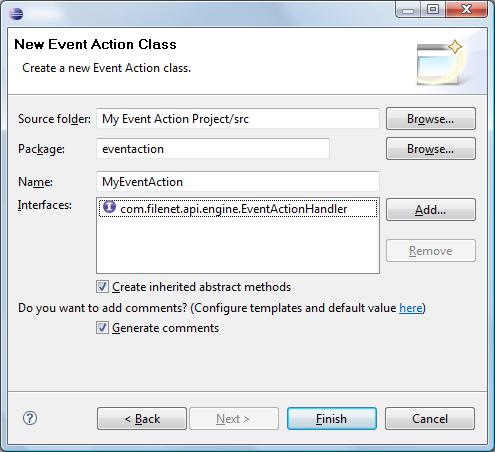
In this dialog page you can specify the name of the new Event Action. The Class Name combo box will show all the names of all the classes of the Code Module implementing the EventActionHandler interface. - If the wizard is finished a new Event Action coupled to this Code Module will be created.
Code Modules View
All the Code Modules which are either created by the ECM Developer plug-in or imported by the ECM Developer plug-in are shown in the Code Modules view. You can open this view using the Window > Show view >Other command. The Code Modules view is located in the ECM Developer category. If you are in the Object Store perspective then there is a shortcut to this view in the Window > Show view menu.
Selecting this view will show the following window:

The toolbar and the context menu of this view also provide most of the functionality described above, such as creating, editing and updating Code Modules. One feature not yet described is the Remove command. This command will remove the Code Module from this view but will not remove the Code Module on the Content Engine. So this action can be undone by re-importing the Code Module into the workspace.